
WELCOME TO THE HAIR CANON
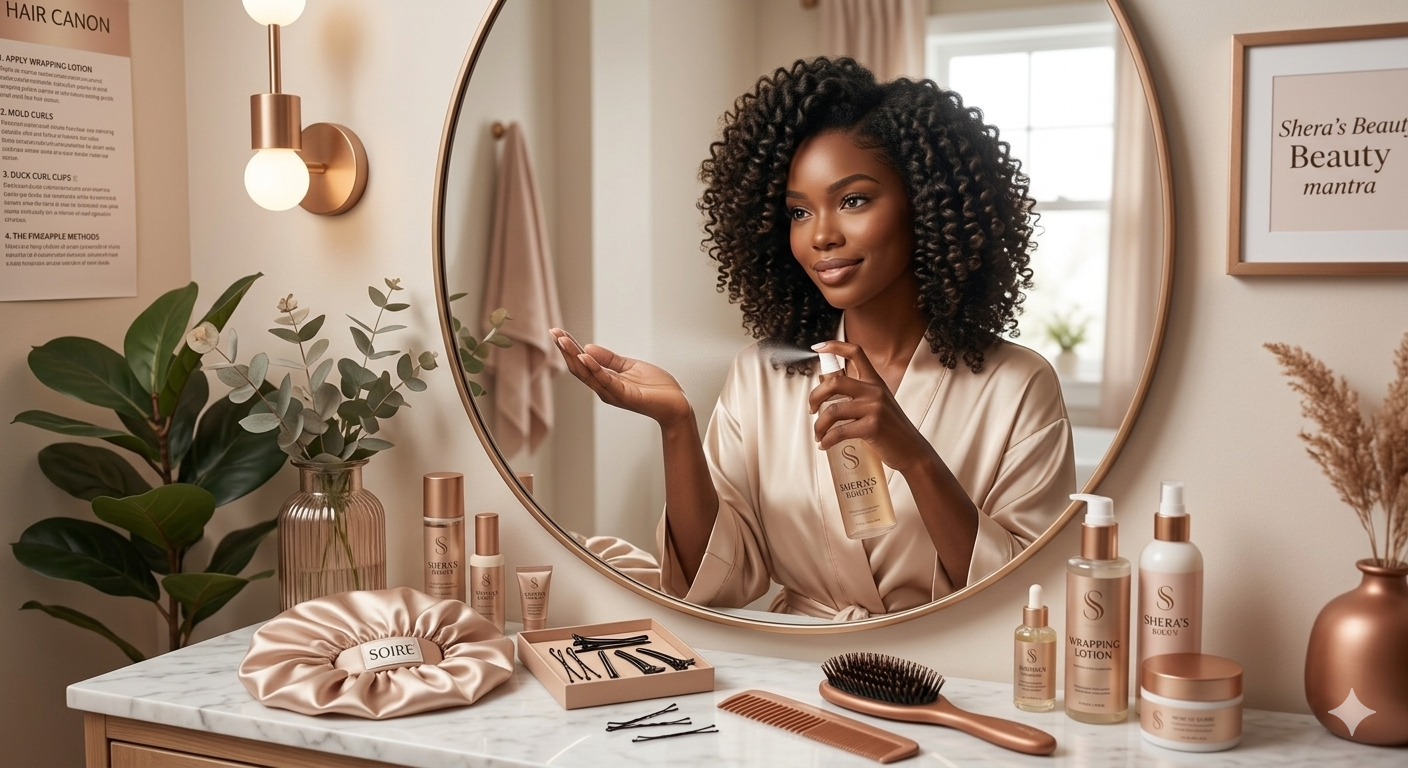
At Shera’s Beauty and Wellness Hub, we believe that a flawless look doesn’t end when you step out of the salon chair, that’s where the journey begins. Your hair is an investment, and protecting that investment requires the right tools, routines, and a little bit of daily discipline.
Whether you just received a bone-straight silk press, a sleek smoothing treatment, a vibrant color transformation, or a gorgeous new install, this guide is designed specifically for you and establishes the standard. We’re pulling back the curtain on professional maintenance secrets so you can confidently keep your hair looking fresh, healthy, and salon-perfect for as long as possible. Dive into our tailored care routines below and give your crown the daily royalty treatment it deserves!
FLAT IRON, SLIK PRESS, BLOW OUT
To keep a fresh flat iron, silk press, or blowout looking flawless—especially during the critical first few days—you must protect it from its two biggest enemies: moisture and friction.
Here is how you can preserve your bounce, shine, and sleekness at home, especially during the first week:
-
Water will instantly cause textured hair to revert back to its natural pattern.
Shower Protection: A standard shower cap isn't enough because steam creeps underneath. Wrap your hair first and tie it down with a silk or satin scarf, followed by a thick terry-cloth-lined shower cap. Try to keep your face out of the direct water stream to protect your hairline from reverting to its natural texture.
Workout Strategy: If you exercise, you should tie your hair down firm and snug, rather than tight, using a silk scarf, satin scarf, or a sweat-wicking gym band. Crucial tip: You must leave the scarf on until your scalp is completely cool and dry to prevent the roots from puffing up.
-
A great silk press gets its bounce from hydration during the salon wash, not from heavy greases.
Less is More: There is no need to add heavy hair creams, butters, or oils at home. It will weigh the hair down, making it look stiff and greasy. If needed, add oils only to the scalp for those who may have scalp conditions. If you must use a scalp serum or medicated scalp product, lightly blow-dry the roots with moderate tension where the product will be applied to prevent reversion.
Lightweight Shine: If the ends look a bit dry after a few days, only a tiny drop of a lightweight oil or serum should be applied.
-
The biggest mistake clients make is re-straightening their hair every morning.
Avoid Daily Heat: Re-applying heat daily cooks the hair, causes severe heat damage, and strips away the salon shine.
Heatless Fixes: If a section loses its shape, you should rely on pin curls or rollers to revive the bounce instead of reaching for the flat iron.
The Frizz Trap: If your hair isn't heat-trained or you still have a decent amount of split ends, do not touch it with heat at home. Splitting and untrained hair will naturally try to revert and frizz sooner than later. If you chase that frizz with a flat iron, the high heat will instantly blow open those split ends even further, travelling up the hair shaft and causing unrepairable breakage. You will end up sacrificing your hair health just to save a style for an extra day.
-
We always recommend a heatless week, but if a touch-up is unavoidable, you must adjust based on your hair's current condition:
The Healthy Hair Protocol: If your hair is healthy, trimmed, and heat-trained, it has "style memory." You can use a flat iron on a very low heat setting (under 300°F/150°C) for a quick, single-pass touch-up around the hairline or parting space. Always use a light heat protectant first.
The Unhealthy, Damaged, or Untrained Protocol: If your hair is currently damaged, dealing with split ends, or is not heat-trained, it is not at its optimal health to retain style memory. Because of this, it will naturally want to revert to its natural state much faster. This means it will require more maintenance. Chasing that reversion with a flat iron will trap you in a dangerous cycle: you will feel forced to use more heat, more often, which will ultimately compromise your hair structure and lead to permanent damage.
Reality Check: It is completely normal to see reversion the same day or the next day if your hair is dry, highly porous, and not heat-trained. If this is you, unfortunately, the longevity of these styles may not be something you get to benefit from yet. Instead of focusing so much on how long the flat iron, silk press, or blow-dry will stay, focus more on repairing your hair's health and using the style strictly as a length check.
-
How you sleep determines how long your style lasts.
The Classic Wrap: For bone-straight silk presses or flat irons, brush your hair in a continuous circular motion around your head (a "doobie" or "tubey" wrap). This helps to keep your hair flat and prevents creases.
Pin Curls or Flexi-Rods: For blowouts or silk presses with body and curls, wrapping will flatten the volume. Instead, secure your hair in large pin curls or use soft flexi-rods overnight.
The Silk/Satin Standard: Always secure your wrap, pin curls, or flexi-rods with a silk scarf (preferred fabric) or satin scarf, and then cover over with a bonnet. Sleeping on a cotton pillowcase absorbs the hair's natural moisture and causes instant frizz. Use a silk pillowcase instead or cover your pillow with a silk scarf.
WASH & GO, NATURAL CURLS, PROTECTIVE STYLES
(cornrows, twists, flat twists, plaits AND SINGLE BRAIDS)
Natural curls, coils, and protective styles thrive on two major things: targeted moisture and zero friction. Whether you are rocking a defined wash-and-go, a bouncy twist-out, or a fresh set of protective braids, maintaining the definition and preventing frizz requires a careful touch at home.
Here is how to keep your texture looking juicy, defined, and frizz-free all week long:
-
The goal with a fresh set or wash-and-go is to preserve the curl pattern without causing the strands to tangle or frizz prematurely.
The Pineapple Method: Before bed, gather your curls loosely at the very top of your head near your forehead using a satin scrunchie. Do not loop the scrunchie twice—keep it loose. This prevents you from sleeping directly on your curls and flattening them.
The Morning Refresh: In the morning, take down your pineapple and let your curls drop naturally. Do not immediately run your fingers through them, as this creates instant frizz. Instead, mist your hair lightly with water or a lightweight curl refresher spray, and gently fluff the roots with a hair pick to restore volume.
Hands Off: Once your style is set, stop touching it. Constant manipulation breaks apart the curl clumps, strips away the product cast, and invites immediate frizz.
-
Protective styles are excellent for low maintenance, but they still require upkeep to protect your real hair underneath and keep the style looking neat.
Tame the Frizz: To keep your parts clean and prevent flyaways, tie your braids or twists down flat every single night using a silk or satin scarf.
Scalp Care is Key: Your scalp is completely exposed, meaning it will collect buildup, sweat, and environmental debris. Cleanse your parts weekly using a cotton pad soaked in a clarifying scalp serum or an alcohol-free witch hazel. If your scalp feels dry or itchy, apply a lightweight, anti-fungal scalp oil directly to your parts.
Never Leave Them in Too Long: Protective styles are temporary. Leaving braids or twists in for longer than 6 to 8 weeks can cause your natural hair to mat at the root, leading to severe breakage during the takedown process.
-
Natural texture loses moisture faster than any other hair type because sebum has a harder time traveling down a coiled hair shaft.
Hydrate from Within: Spritz your hair with a liquid moisture refresher spray or a moisture milk spray every few days to rehydrate the strands.
Seal it In: Follow up your water mist with a tiny amount of a lightweight oil or cream to seal that moisture into the hair cuticle. Focus primarily on your ends, which are the oldest and driest parts of your hair.
-
Cotton pillowcases act like a vacuum for natural hair, drinking up all your natural oils and roughing up the curl cuticle.
The Silk/Satin Standard: Always secure your pineapple or braids with a silk scarf (preferred fabric) or a satin bonnet. For ultimate protection, sleep on a silk pillowcase so that even if your bonnet slips off in the middle of the night, your curls are still fully protected from friction.
LOCS
To keep your locs neat, healthy, strong, and properly hydrated while maintaining clean parting, the routine between your maintenance appointments is absolutely critical.
Here is how you can preserve your freshly palm-rolled or interlocked locs and protect the integrity of your hair at home:
-
How you treat your scalp and roots immediately after your appointment determines how long your clean parts and retwist will last.
Let Palm Rolls Fully Cure: If your locs were maintained using the palm roll method, avoid all moisture—including heavy steam from the shower, rain, and sweating—for the first 48 hours. Palm rolling relies on a water-based gel or setting lotion that needs to fully dry and set. Moisture will cause the roll to unravel instantly.
Give Interlocked Roots a Break: Interlocking is a permanent knotting technique that is instantly secure, so moisture won’t unravel it. However, it puts tension on the scalp. Avoid tight updos, high ponytails, or heavy pulling for the first 3 to 5 days to prevent scalp irritation and thinning at the roots.
-
The unique structure of locs makes them prone to trapping product, lint, and debris, making a clean, residue-free routine non-negotiable.
Clarifying & Residue-Free Shampoos Only: Always use a clear, residue-free, or clarifying shampoo. Avoid creamy shampoos, pearlized formulas, and moisturizing washes, as they leave a film inside the loc that leads to internal buildup and mold (loc fungus).
Skip the Cream Conditioner: Never apply traditional cream conditioners to your locs. They cannot be easily rinsed out from the dense interior of the hair strand. Instead, use a lightweight, water-based leave-in conditioning spray or a natural light oil to hydrate.
Shampooing Frequency & Method: Wait at least 2 to 3 weeks after a palm-roll retwist before shampooing to avoid unraveling. If you are interlocked, you can shampoo sooner. Focus the shampoo entirely on your scalp, gently massaging with your fingertips. Do not scrub or bunch the lengths of your locs together; let the suds rinse down them naturally.
-
Lint is the number one enemy of mature locs. Once lint embeds deep inside the loc matrix, it is nearly impossible to remove without damaging the hair.
Avoid Fuzzy Fabrics: Be mindful of high-pile sweaters, wool coats, and fuzzy blankets. If you wear these fabrics, keep your locs tied up and away from the material.
Check Your Towel: Stop drying your locs with traditional terry cloth cotton towels, which shed thousands of tiny lint fibers. Switch to a microfiber towel or a clean cotton t-shirt to squeeze excess water out of your hair.
-
Dry locs break. Because natural oils have a hard time traveling down the coiled structure of a loc, you must manually infuse moisture.
Hydrate Before You Oil: Oil is a sealer, not a moisturizer. Always spray your locs with a water-based rosewater mist or a lightweight leave-in spray first, then apply a natural oil (like jojoba, avocado, or grapeseed oil) to lock that moisture into the hair strands.
Separate Your Roots After Washing: When your locs are damp, they naturally want to fuse together. After every wash, gently pull your locs apart at the roots to maintain your clean parting and prevent them from matting together.
Drying is Critical: Never bunch up damp locs or tie them into a bun while wet. Ensure your locs are 100% dry—using a hood dryer, hand dryer, or ample sun exposure—before tying them up or going to sleep to prevent trapped moisture and odours.
-
Friction against cotton sheets strips moisture from your hair and transfers bedding lint directly into your locs.
The Silk/Satin Compression Standard: Always sleep in a high-quality silk scarf (preferred fabric) or satin bonnet, loc sock. If your locs are exceptionally long, a spacious silk or satin bonnet or a satin pillowcase ensures they can move freely without catching on rough fibers.
SLEEK PONYTAILS
(Gel, GLUED, SPRITZ SPRAYED)
To keep your sleek ponytail looking flawless, and flyaway-free for as long as possible, the first 24 hours and your nightly routine are absolutely critical.
Here is how you can preserve your crisp, high-shine results and extend the lifespan of your sleek style at home:
-
During the first day, the gel and edge control are curing to create that firm, glass-like hold. Any premature friction or moisture will cause the style to frizz or lift.
Keep It Completely Dry: Avoid all moisture, including rain, heavy steam from the shower, and facial mists. If you need to shower, wear a high-quality, oversized shower cap that completely seals your hairline without compressing the crown.
Hands Off: Avoid touching, scratching, or adjusting the ponytail. Constantly touching the sleek base can break the gel cast, causing individual hairs to pop up and create a fuzzy texture.
-
You cannot completely wash a gelled ponytail without destroying the style, so spot-cleaning and precise refreshing are non-negotiable.
Spot-Clean the Perimeter: If makeup or sweat builds up around your hairline, do not wet the area. Use a damp microfiber cloth or a cotton pad soaked in micellar water to gently wipe the skin right up to the edge of the hair.
Avoid Water-Based Re-application: If a flyaway pops up, do not apply water to smooth it down, as water will dissolve the cured gel and cause immediate frizz. Instead, apply a tiny amount of a firm-hold edge control, a pomade, or a light-hold hairspray onto a clean toothbrush and gently brush the stray hair back into place.
Don't Over-Layer Products: Adding heavy layers of gel day after day will cause the product to flake and turn white. Stick to lightweight taming sticks or oil-based serums for daily maintenance.
-
Sweat is moisture and will aggressively soften the gel cast, leading to ripples, puffiness and frizz around the hairline.
The Sweat-Band Trick: If you must workout or if you are in a highly humid environment, tie a tight elastic satin or nylon headband firmly over your edges before you begin.
Blow-Dry and Cool Down: Leave the headband on until your body has completely cooled down and your scalp is dry. If the perimeter feels slightly damp, gently blow-dry the hair through the headband on a cool setting to lock the gel back into place before removing the band.
-
While the base of your hair is locked down, the extended length of the ponytail requires daily care to avoid tangles and matting.
Detangle the Tail Daily: Hold the base of the ponytail firmly with one hand to prevent pulling on the gelled section. Use your other hand to gently brush out the length with a paddle brush, starting from the tips and working your way up.
Hydrate the Ends: The gel keeps the top of your hair sealed, but the ponytail length can dry out. Apply a pea-sized amount of a lightweight hair oil or serum strictly to the mid-shafts and ends of the ponytail every morning to maintain softness and swing.
-
Friction from your pillowcase will instantly rough up the gelled base, destroy your smooth edges, and cause painful pulling at the hair tie.
The Silk/Satin Compression Standard: Always sleep on a silk or satin pillowcase. More importantly, you must compress the sleek base. Tie a silk or satin scarf tightly around the perimeter and crown of your head before bed, leaving the ponytail length free out the back. This keeps the hair perfectly flat and prevents friction ripples while you toss and turn.
Secure the Length: To prevent the ponytail from tangling or tangling around your neck overnight, gently braid the length into one loose braid or wrap it into a soft satin scrunchie at the base of your neck. Unbraid or release it in the morning for instant, smooth volume.
KERATIN TREATMENT, AMINO ACID TREATMENT, NANOPLASTIA
To keep your smoothing treatment—whether it's a Keratin Treatment, Amino Acid Treatment, or Nanoplastia—looking sleek, frizz-free, and beautiful for as long as possible, the first few days are absolutely critical.
Here is how you can preserve your smooth, shiny results and extend the lifespan of your treatment at home:
-
During the first three days, the treatment is still settling into your hair strands. Any disruptions can create permanent dents or premature reversion.
- Keep It Dry: Avoid all moisture, including rain, environmental humidity, heavy steam from the shower, and swimming. If your hair accidentally gets damp or wet, immediately blow-dry it on medium heat and gently pass a flat iron over the area on a low setting.
- Leave It Down: Do not tuck your hair behind your ears, and avoid using hair ties, clips, pins, or headbands. Do not tie your hair up at all during these first 3 days, as doing so will cause permanent creases in your sleek new texture.
-
The fastest way to wash a smoothing treatment down the drain is by using the wrong shampoo.
Sodium Chloride-Free is Non-Negotiable: Check your labels carefully. You must use a shampoo and conditioner that are completely sodium chloride-free (salt-free). Sodium chloride is a thickener used in many shampoos that will prematurely strip the treatment from your hair.
Sulfate-Free Support: Ensure your hair care routine is also sulfate-free to prevent stripping the natural oils and coating molecules that keep your hair smooth.
Shampoo Less Often: Extend the time between wash days. The less frequently you wash your hair, the longer the treatment will last. Limit shampooing your hair to 1 to 2 times per week, as over-shampooing will cause the treatment to prematurely fade. Try replacing a wash with a high-quality dry shampoo if roots get oily.
Note: This is not possible for every client. If you have a scalp condition or need more hydration, you may need to shampoo more often.
Technique Matters: When you do wash, concentrate the shampoo strictly on your scalp and root area. Let the suds rinse down the lengths naturally rather than scrubbing the mid-shafts and ends.
-
Both pool water and ocean water will aggressively degrade your smoothing treatment.
The Pre-Soak Secret: If you plan to swim, rinse your hair thoroughly with clean tap water and apply a leave-in conditioner or hair mask before getting into the pool or beach. Your hair acts like a sponge; soaking it with clean water first helps to slow down the absorption rate of the harsh salt or chlorine. While this technique may not protect against them 100%, it provides a highly effective shield.
Rinse Immediately: As soon as you step out of the water, thoroughly rinse the salt or chlorine out of your hair.
-
Heat Activation is Key: These treatments are heat-activated. Instead of air-drying—which can allow slight frizz to return—always blow-dry your hair downward with a brush after washing to seal the cuticle and restore the sleek finish.
Always Use Heat Protectant: Apply a lightweight blow-dry cream or heat-protectant serum before using any hot tools to prevent the structural proteins from breaking down.
-
Working out introduces salt and moisture through your sweat, which can break down your treatment faster around the hairline.
Blow-Dry Post-Workout: After a heavy workout, do not leave your scalp damp. Blow-dry the sweat out of your roots on a cool or medium setting immediately to prevent frizz and reversion around your perimeter.
-
Friction from your pillowcase roughs up the hair cuticle and diminishes that brilliant salon shine.
The Silk/Satin Standard: Always sleep on a silk (preferred fabric) or satin pillowcase, or protect your hair with a silk scarf or bonnet. This eliminates friction, prevents tangles, and keeps the hair cuticle flat and smooth while you sleep. Use a silk pillowcase instead or cover your pillow with a silk scarf.
Choose Your Nightly Style: Before you tie down your hair, determine if you need to wrap it or pin curl it:
The Classic Wrap: For a bone-straight look, brush your hair in a continuous circular motion around your head (a "doobie" or "tubey" wrap). This helps to keep your hair flat and prevents creases.
Pin Curls or Flexi-Rods: If you want to maintain body and curls, wrapping will flatten the volume. Instead, secure your hair in large pin curls or use soft flexi-rods overnight.
COLOUR, RELAXER, TEXTURIZER
Chemical services like hair color, texturizers and relaxers completely transform your look, but they also change the structural makeup of your hair. To prevent your vibrant color from fading into a dull shade, and to protect your delicate new growth from snapping, a strict home-care routine is non-negotiable.
Here is how to maximize your investment, keep your color rich, and safely manage your roots between salon visits:
-
The first few days after a chemical service set the tone for your hair's overall health and longevity.
Wait to Wash Colour: Wait at least 48 to 72 hours before shampooing newly coloured hair. This gives the hair cuticle plenty of time to completely close, locking the colour pigments securely inside the strand.
Give Relaxers Room to Breathe: Avoid any heavy sweat, manipulation, or soaking wet moisture for the first 48 hours after a relaxer or texturizer. Your hair's pH balance is settling back down, and it's at its most fragile state.
-
Color molecules are highly sensitive to water, heat, and harsh ingredients.
Turn Down the Temperature: Washing your hair with hot water opens up the hair cuticle, allowing your expensive colour to literally wash down the drain. Always wash and rinse your hair with cool or lukewarm water to keep the cuticle sealed and the colour locked in.
Use Colour-Safe, Sulfate-Free Cleansers: Sulfates are harsh detergents that strip away colour pigments. Always use professional, sulfate-free shampoos specifically formulated for colour-treated hair.
Stretch Out Wash Days: Every single time water touches your coloured hair, a small amount of pigment escapes. Limit your washes to 1 to 2 times a week, relying on a high-quality dry shampoo to refresh your roots in between.
-
The point where your smooth, relaxed or texturized hair meets your textured, natural new growth is called the line of demarcation. This is the weakest link on your entire strand and is highly prone to snapping if handled roughly.
Be Gentle When Detangling: Always detangle your hair when it is saturated with a slippery conditioner or a high-quality leave-in spray. Use a wide-tooth comb or a flexible detangling brush, and always start from the ends, gently working your way up to the new growth. Never yank through your roots.
Moisture is Your Best Friend: Your natural new growth requires significantly more moisture than your relaxed or texturized ends. Apply a targeted cream moisturizer or leave-in lotion directly to your roots to keep the new growth soft, pliable, and cooperative until your next touch-up.
Avoid Over-Processing: Never attempt to apply a box relaxer or texturizer to your own roots at home. Overlapping chemicals onto previously relaxed or texturized hair causes severe thinning, chemical burns, and irreversible breakage. Leave the root touch-ups strictly to the professional chair every 8 to 12 weeks.
-
Both colour, relaxers and texturizers strip away the hair's natural protein and moisture barriers.
The Balancing Act: Alternate your deep conditioning sessions. Use a protein-rich mask once a month to rebuild the broken bonds and structural integrity of the hair. Follow up on subsequent wash days with a deep moisture mask to restore elasticity and prevent brittleness.
Bond-Building Support: Incorporate a professional bond-repair treatment into your monthly routine to mend the internal structure of chemically altered strands.
-
Chemically treated hair breaks much faster under friction than natural, untouched hair.
The Silk/Satin Standard: Never sleep directly on a cotton pillowcase, which creates friction and snaps delicate strands. Wrap your hair nightly in a silk scarf (preferred fabric) or satin bonnet, or sleep exclusively on a silk pillowcase to keep your hair smooth and protected while you rest.
Choose Your Nightly Style: Before you tie down your hair, determine if you need to wrap it or pin curl it:
The Classic Wrap: For a bone-straight look, brush your hair in a continuous circular motion around your head (a "doobie" or "tubey" wrap). This helps to keep your hair flat and prevents creases.
Pin Curls or Flexi-Rods: If you want to maintain body and curls, wrapping will flatten the volume. Instead, secure your hair in large pin curls or use soft flexi-rods overnight.
JAPANESE STRAIGHTENING
To keep your permanent straightening treatment looking mirror-sleek, glossy, and beautifully pin-straight for as long as possible, the first few days are absolutely critical.Here is how you can preserve your bone-straight results and protect the health of your hair at home:
-
During the first three days, the bonds in your hair are still settling into their new, permanently straight structure. Any manipulation during this window will lock in permanent dents, kinks, or frizz.
Keep It Completely Dry: Avoid all forms of moisture. This includes rain, environmental humidity, heavy steam from the shower, and swimming. If your hair accidentally gets damp or wet, immediately blow-dry it on medium heat and gently pass a flat iron over the area on a low setting.
Leave It Completely Down: Do not tuck your hair behind your ears, and avoid using hair ties, clips, pins, or headbands. Do not tie your hair up at all during these first 3 days, as doing so will cause permanent, unfixable creases in your sleek new texture.
-
Because Japanese straightening is permanent, your main goal is maintaining hair health and preventing the treated strands from drying out.
Sodium Chloride-Free is Non-Negotiable: Check your labels carefully. You must use a shampoo and conditioner that are completely sodium chloride-free (salt-free). Sodium chloride will prematurely strip the internal moisture from your chemically altered strands, leaving them brittle.
Sulfate-Free Support: Ensure your hair care routine is also sulfate-free to prevent stripping away the essential hydration that keeps your straightened hair looking reflective and healthy.
Deep Condition Weekly: While other smoothing treatments coat the hair, Japanese straightening alters it from the inside out. Incorporate a rich, deep-moisturizing mask once a week to maintain elasticity and prevent dry ends.
Technique Matters: When you do shampoo, concentrate the shampoo strictly on your scalp and root area. Let the suds rinse down the lengths naturally rather than scrubbing the mid-shafts and ends.
-
Chemically straightened hair is highly porous, making it incredibly vulnerable to the drying effects of pool and ocean water.
The Pre-Soak Secret: If you plan to swim, rinse your hair thoroughly with clean tap water and apply a leave-in conditioner or hair mask before getting into the pool or beach. Your hair acts like a sponge; soaking it with clean water first helps to slow down the absorption rate of the harsh salt or chlorine. While this technique may not protect against them 100%, it provides a highly effective shield.
Rinse Immediately: As soon as you step out of the water, thoroughly rinse the salt or chlorine out of your hair.
-
Always Blow-Dry Downward: Point the nozzle of your hairdryer downward from roots to ends. This closes the hair cuticle completely, which enhances the mirror-like shine and ensures your hair remains entirely frizz-free.
Always Use Heat Protectant: Your hair is permanently straight, so you will rarely need a flat iron. However, if you do use hot tools, always apply a lightweight heat-protectant serum beforehand to prevent structural breakage.
-
During the first 72 hours, sweat can ruin the straightening process. After that window, sweat must still be managed to protect the hair perimeter.
Avoid Workouts Initially: Do not exercise or enter saunas during the first 3 days, as sweat will cause the hair to revert or kink around the hairline.
Blow-Dry Post-Workout: After the 72-hour window has passed, do not leave your scalp damp with sweat after a heavy workout. Blow-dry the sweat out of your roots on a cool or medium setting immediately to maintain a clean, flat finish around your perimeter.
-
Friction from your pillowcase roughs up the hair cuticle and diminishes that brilliant salon shine.
The Silk/Satin Standard: Always sleep on a silk (preferred fabric) or satin pillowcase, or protect your hair with a silk scarf or bonnet. This eliminates friction, prevents tangles, and keeps the hair cuticle flat and smooth while you sleep. Use a silk pillowcase instead or cover your pillow with a silk scarf.
Choose Your Nightly Style: Before you tie down your hair, determine if you need to wrap it or pin curl it:
The Classic Wrap: For a bone-straight look, brush your hair in a continuous circular motion around your head (a "doobie" or "tubey" wrap). This helps to keep your hair flat and prevents creases.
Pin Curls or Flexi-Rods: If you want to maintain body and curls, wrapping will flatten the volume. Instead, secure your hair in large pin curls or use soft flexi-rods overnight.
EXTENSIONS & WIGS
A high-quality install, wig, or extension service is a major investment. Keeping your lace melted, your perimeter secure, and your bundles bouncy requires specific home-care steps. Without the proper routine, lace can lift prematurely, glue can damage your hairline, and expensive hair extensions can become matted and dry.
Here is how to properly care for your extensions, preserve your lace, and protect your natural hair underneath:
-
Lace is incredibly delicate. The adhesive used to hold it down is highly sensitive to external elements.
Keep it Dry Initially: Avoid heavy sweating, steam, or water for at least 24 to 48 hours after your install to allow the lace adhesive to completely cure and fully bond to your skin.
The Nightly Banding Method: To prevent your lace from lifting while you sleep, tie your perimeter down snugly every night using an elastic melt band or a silk scarf. This keeps the adhesive pressed firmly against your skin and stops friction from pulling at the edges.
Handle Lifting Gently: If your lace begins to lift, do not pull or yank at it. This will rip your natural edges out and tear the lace. Instead, use a tiny drop of a safe lace-positioning gel or skin-safe adhesive to lay it back down, or wait until your next professional maintenance appointment.
-
Your natural hair health always comes first, especially around your delicate hairline.
Never Force a Takedown: When it is time to remove a glued wig or install, never pull it off dry. You must use a professional adhesive remover or a high-quality, oil-based breakdown spray. Saturate the lace completely, wait for the glue to fully liquefy, and let the lace slide off effortlessly.
Cleanse the Residue: Once the wig is off, thoroughly clean your skin and hairline with a gentle glue-remover shampoo to ensure no sticky residue is left behind to clog your pores.
-
Extensions do not receive natural oils from your scalp, meaning they can dry out, tangle, and matte much faster than your own hair.
Brush with Care: Always use a loop brush, paddle brush or a wide-tooth comb to detangle your extensions. Start from the very tips of the hair and gently work your way up to the roots to prevent shedding and tension on your tracks or braids.
Wash with Hydration: Shampoo your install every 1 to 2 weeks using a sulfate-free, hydrating shampoo. Follow up with a rich, moisturizing deep-conditioning mask. When shampooing an install, make sure to thoroughly dry your natural braided foundation underneath using a hooded dryer or a targeted blow-dry nozzle to prevent mold and scalp irritation.
Minimize Hot Tools: Just like your natural hair, extensions suffer from heat damage. Use a lightweight heat-protectant serum before flat-ironing or curling your bundles, and keep your tool settings on medium heat.
-
Friction is the ultimate enemy of extension longevity, causing immediate matting at the nape of the neck.
The Protection Protocol: Before bed, tie your hair down. For long bundles, secure them in a loose, low ponytail or a couple of large braids to prevent tangling.
The Silk/Satin Standard: Cover your hair with a large silk scarf (preferred fabric) or a satin bonnet to keep the hair smooth. Always sleep on a silk pillowcase as an extra layer of protection in case your bonnet slips off.
Choose Your Nightly Style: Before you tie down your hair, determine if you need to wrap it or pin curl it:
The Classic Wrap: For a bone-straight look, brush your hair in a continuous circular motion around your head (a "doobie" or "tubey" wrap). This helps to keep your hair flat and prevents creases.
Pin Curls or Flexi-Rods: If you want to maintain body and curls, wrapping will flatten the volume. Instead, secure your hair in large pin curls or use soft flexi-rods overnight.